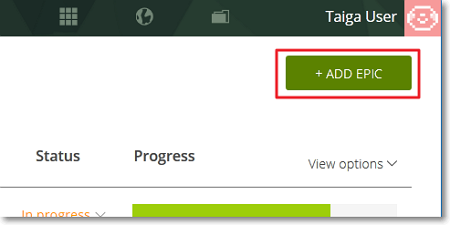
To add a new Epic, go to the Epics Dashboard and then follow these steps:
- On the Epics Dashboard, on the right side of the page, click +ADD EPIC.
This action opens the New Epic form – perform the steps that follow on this form.

- Next to the Subject box, click the currently selected colour for the new Epic and then select another colour or enter an HTML colour code.
- (Optional) Add attachments to the new Epic. To do this, you can just drag-and-drop a file in the designated area (the attachments area) on the form or you can click
 and then select the file you want to attach.
 Note: To delete any file you have previously attached on the form, in the attachments area, position your pointer over that file and then, on the right side of the file’s size, click
 . You can later view and manage the attachments of an Epic from its details page.
 - (Optional) If you do not want the teams to start working on the new Epic after you create it, click BLOCKED and then enter a reason why the Epic is blocked.
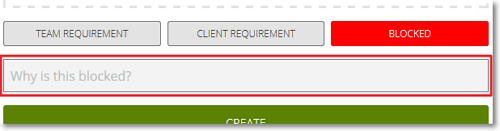
- Click CREATE.
The new Epic is added to the list with Epics on the Epics Dashboard.
 Note: To close the form without adding the new Epic, in the top-right corner of the page, click
 .
.

