To create a new project, on the top navigation bar click ![]() to go to the My Projects page and then follow these steps:
to go to the My Projects page and then follow these steps:
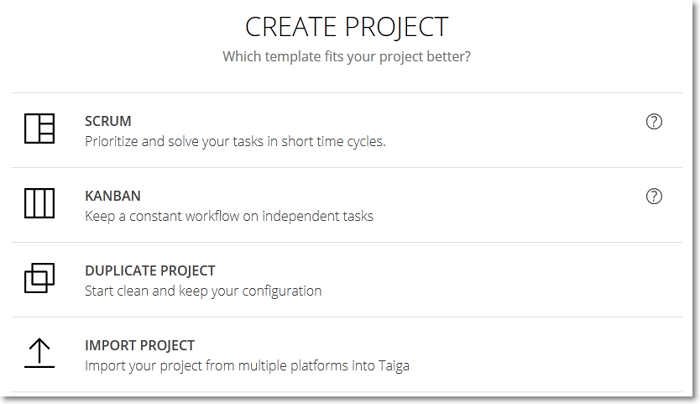
- Click CREATE PROJECT – this action opens a page where you can view the options for creating a project.
 Note: For quick access to the CREATE PROJECT button, on the top navigation bar, hover your pointer over
 .
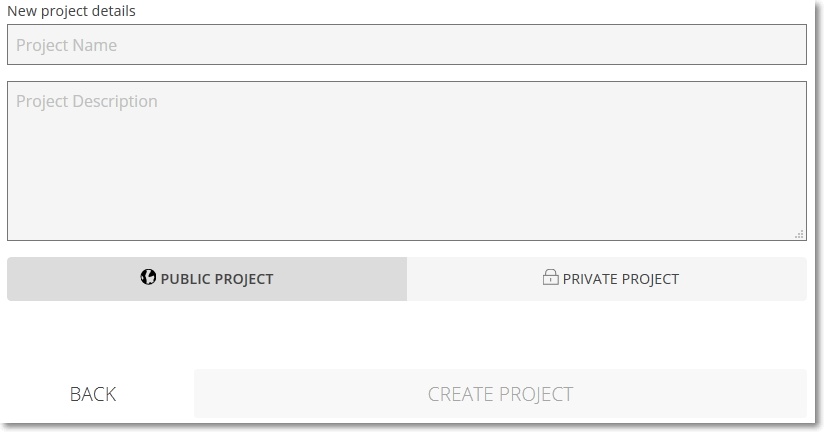
. - Select a template for your new project: SCRUM or KANBAN – this action opens the New project details form.
Depending on the template you choose, not all modules will be available by default for your new project. However, you can change the settings of your project later and select the modules you want to be available – for more details, you can go to Modules.
- Click CREATE PROJECT – this action automatically adds your new project to the projects list and takes you to the project’s KANBAN page or BACKLOG page (depending on the template you choose).
You can now start to set up your project and manage its settings, if necessary. To find out more about managing a project’s settings, you can go to The Admin module.

