To add a new member to the current project, go to the MEMBERS section of the ADMIN module and then follow these steps:
- In the top right corner of the MANAGE MEMBERS list, click + NEW MEMBER.
 This action opens the New Member form.
 - (Optional) If you want to add several new members at the same time, on the New Member form, next to the box that displays the role of the member you are currently adding, click
 .
.
This action adds a new empty row under the row of the member you were previously adding. Repeat steps 3 and 4 for the new row.
Note: To delete the new row, on the right of the box that displays the currently selected role, click .
. - Click CREATE.
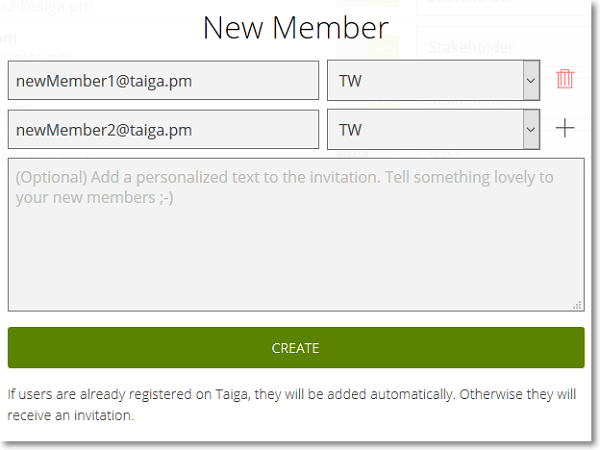 If any e-mail you add belongs to an existing Taiga user, then that user is automatically added to the current project. Otherwise, an invitation is sent to the e-mail address you enter and the owner of that e-mail will be able to create a Taiga account and then access the current project – if the invitation is not accepted yet, you can always resend it.
Note: To delete an existing member (with the invitation accepted or not), on the MANAGE MEMBERS list, on the right side of that member’s status, click  .
.

